
Maple Oatmeal Scones: A Beautifully Craggy Breakfast
Some mornings don’t call for cereal or toast they call for something warm, golden, and just a little bit special. These maple oatmeal scones are the answer to every rushed, half-awake breakfast you’ve ever settled for.
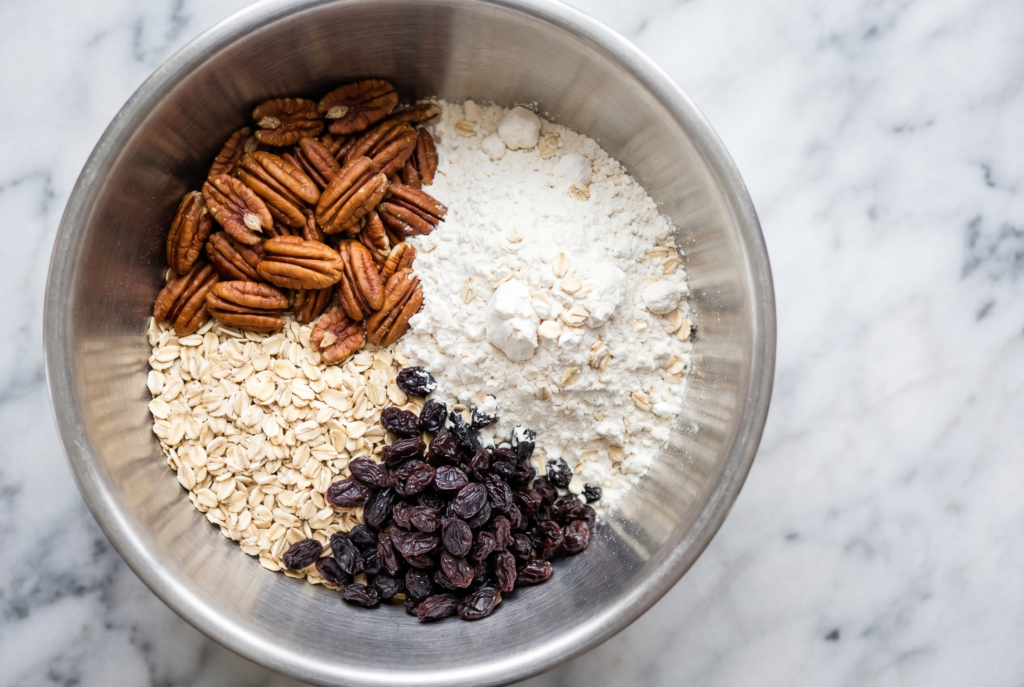
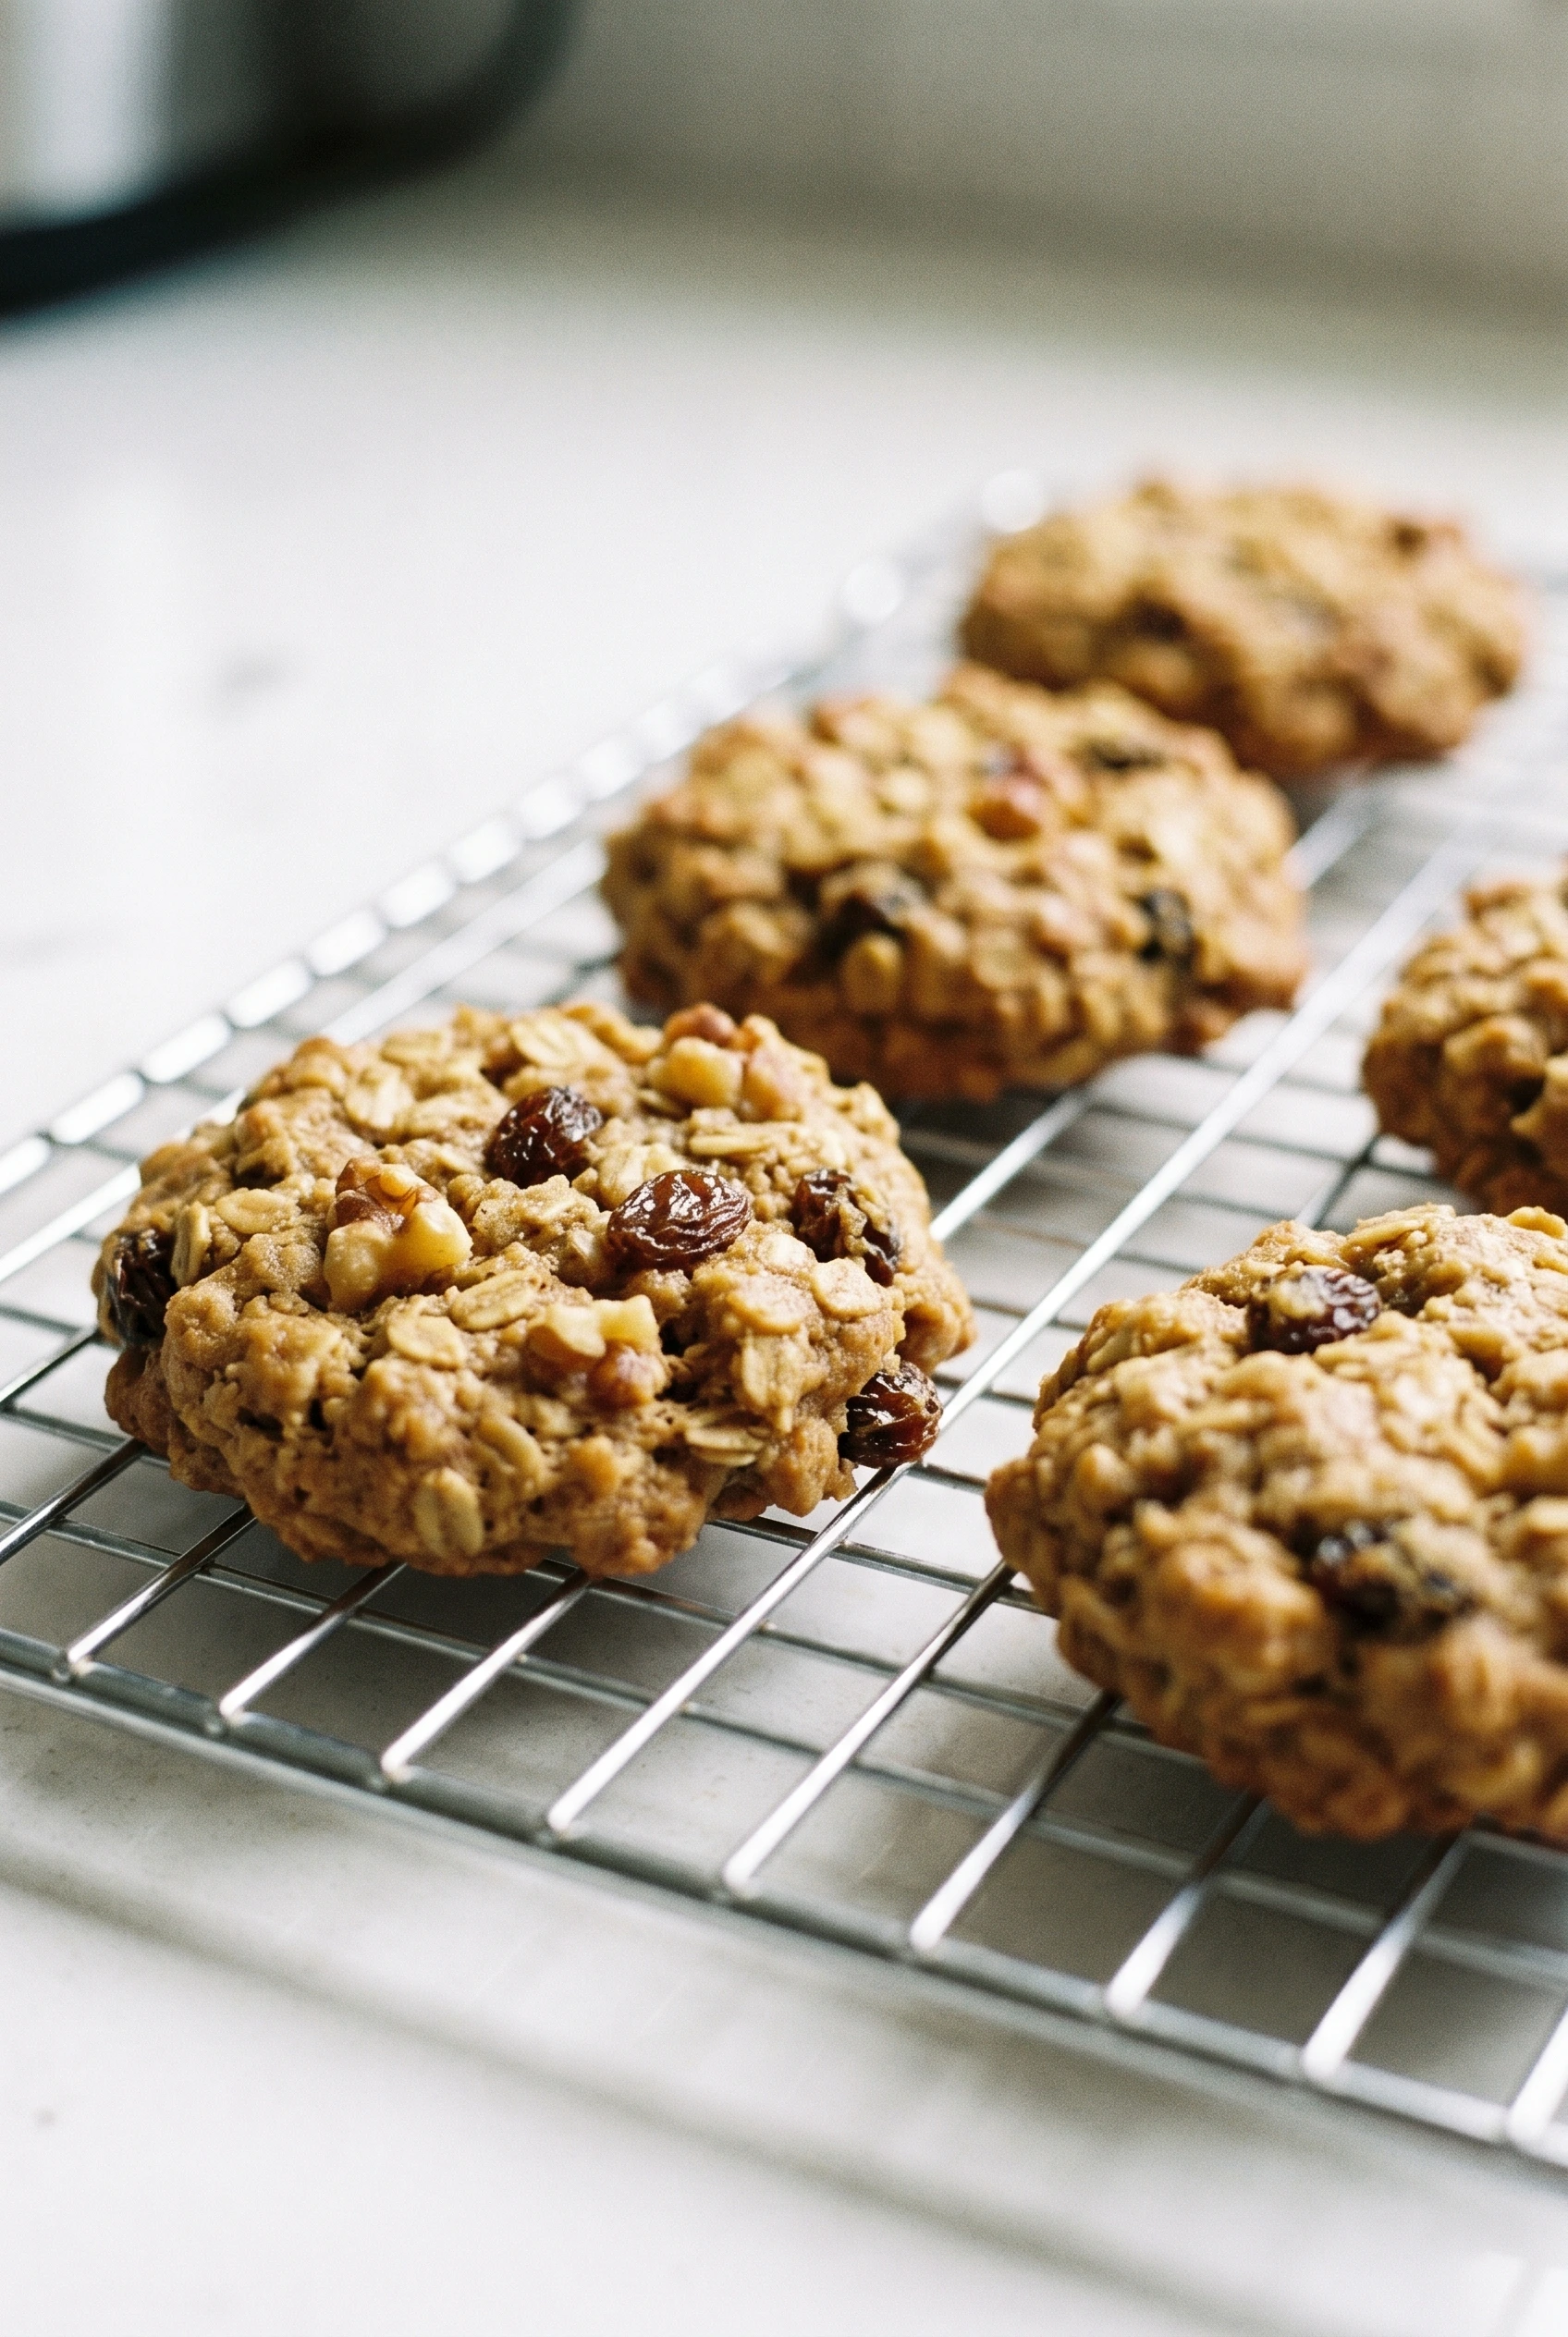
Studded with toasted pecans, sweet currants, and drizzled with a pure maple glaze, they come together in one bowl with zero pastry experience required. The dough is forgiving, the results are beautifully craggy and rustic, and your kitchen will smell like the kind of cozy bed-and-breakfast you’d actually pay to stay in.
Whether you’re feeding a crowd or just yourself on a slow Sunday morning, these scones make ordinary mornings feel genuinely worth waking up for.
reader review
“I have never made scones in my life and these came out PERFECT. Craggy on the outside, soft inside, and that maple glaze is everything. The pecans and currants make every bite so good. My husband said they taste like the fancy coffee shop ones. So so happy with these!!!!” – Carol D.
Loved this too? Add your reviewWhy You’ll Love This Recipe
- Zero pastry skills required: If you can dump ingredients into a bowl and operate an ice cream scoop, you’re already qualified.
- Incredible aroma:The maple pecan oatmeal scones combination makes your kitchen smell like an upscale bed and breakfast within 20 minutes of preheating.
- Forgiving texture: These are meant to look craggy, messy, and imperfect. Rustic is the aesthetic here.
- Kid-approved: The sweet maple glaze conceals a multitude of baking sins and guarantees even the pickiest eaters will reach for seconds.
Perfect Pairings
These homemade oatmeal scones are made for slow mornings. Serve them with:
- A massive mug of black coffee obviously
- Salted butter pressed onto them while they’re still warm enough to melt it
- A lazy Sunday when you want to feel accomplished before noon
- A tall glass of cold milk for anyone under ten
- A cheese board for an elevated weekend brunch spread
Tools You’ll Need
Nothing fancy, I promise.
- Stand Mixer – I use my stand mixer because I am lazy, but a hand mixer or just a bowl and a pastry blender works too.
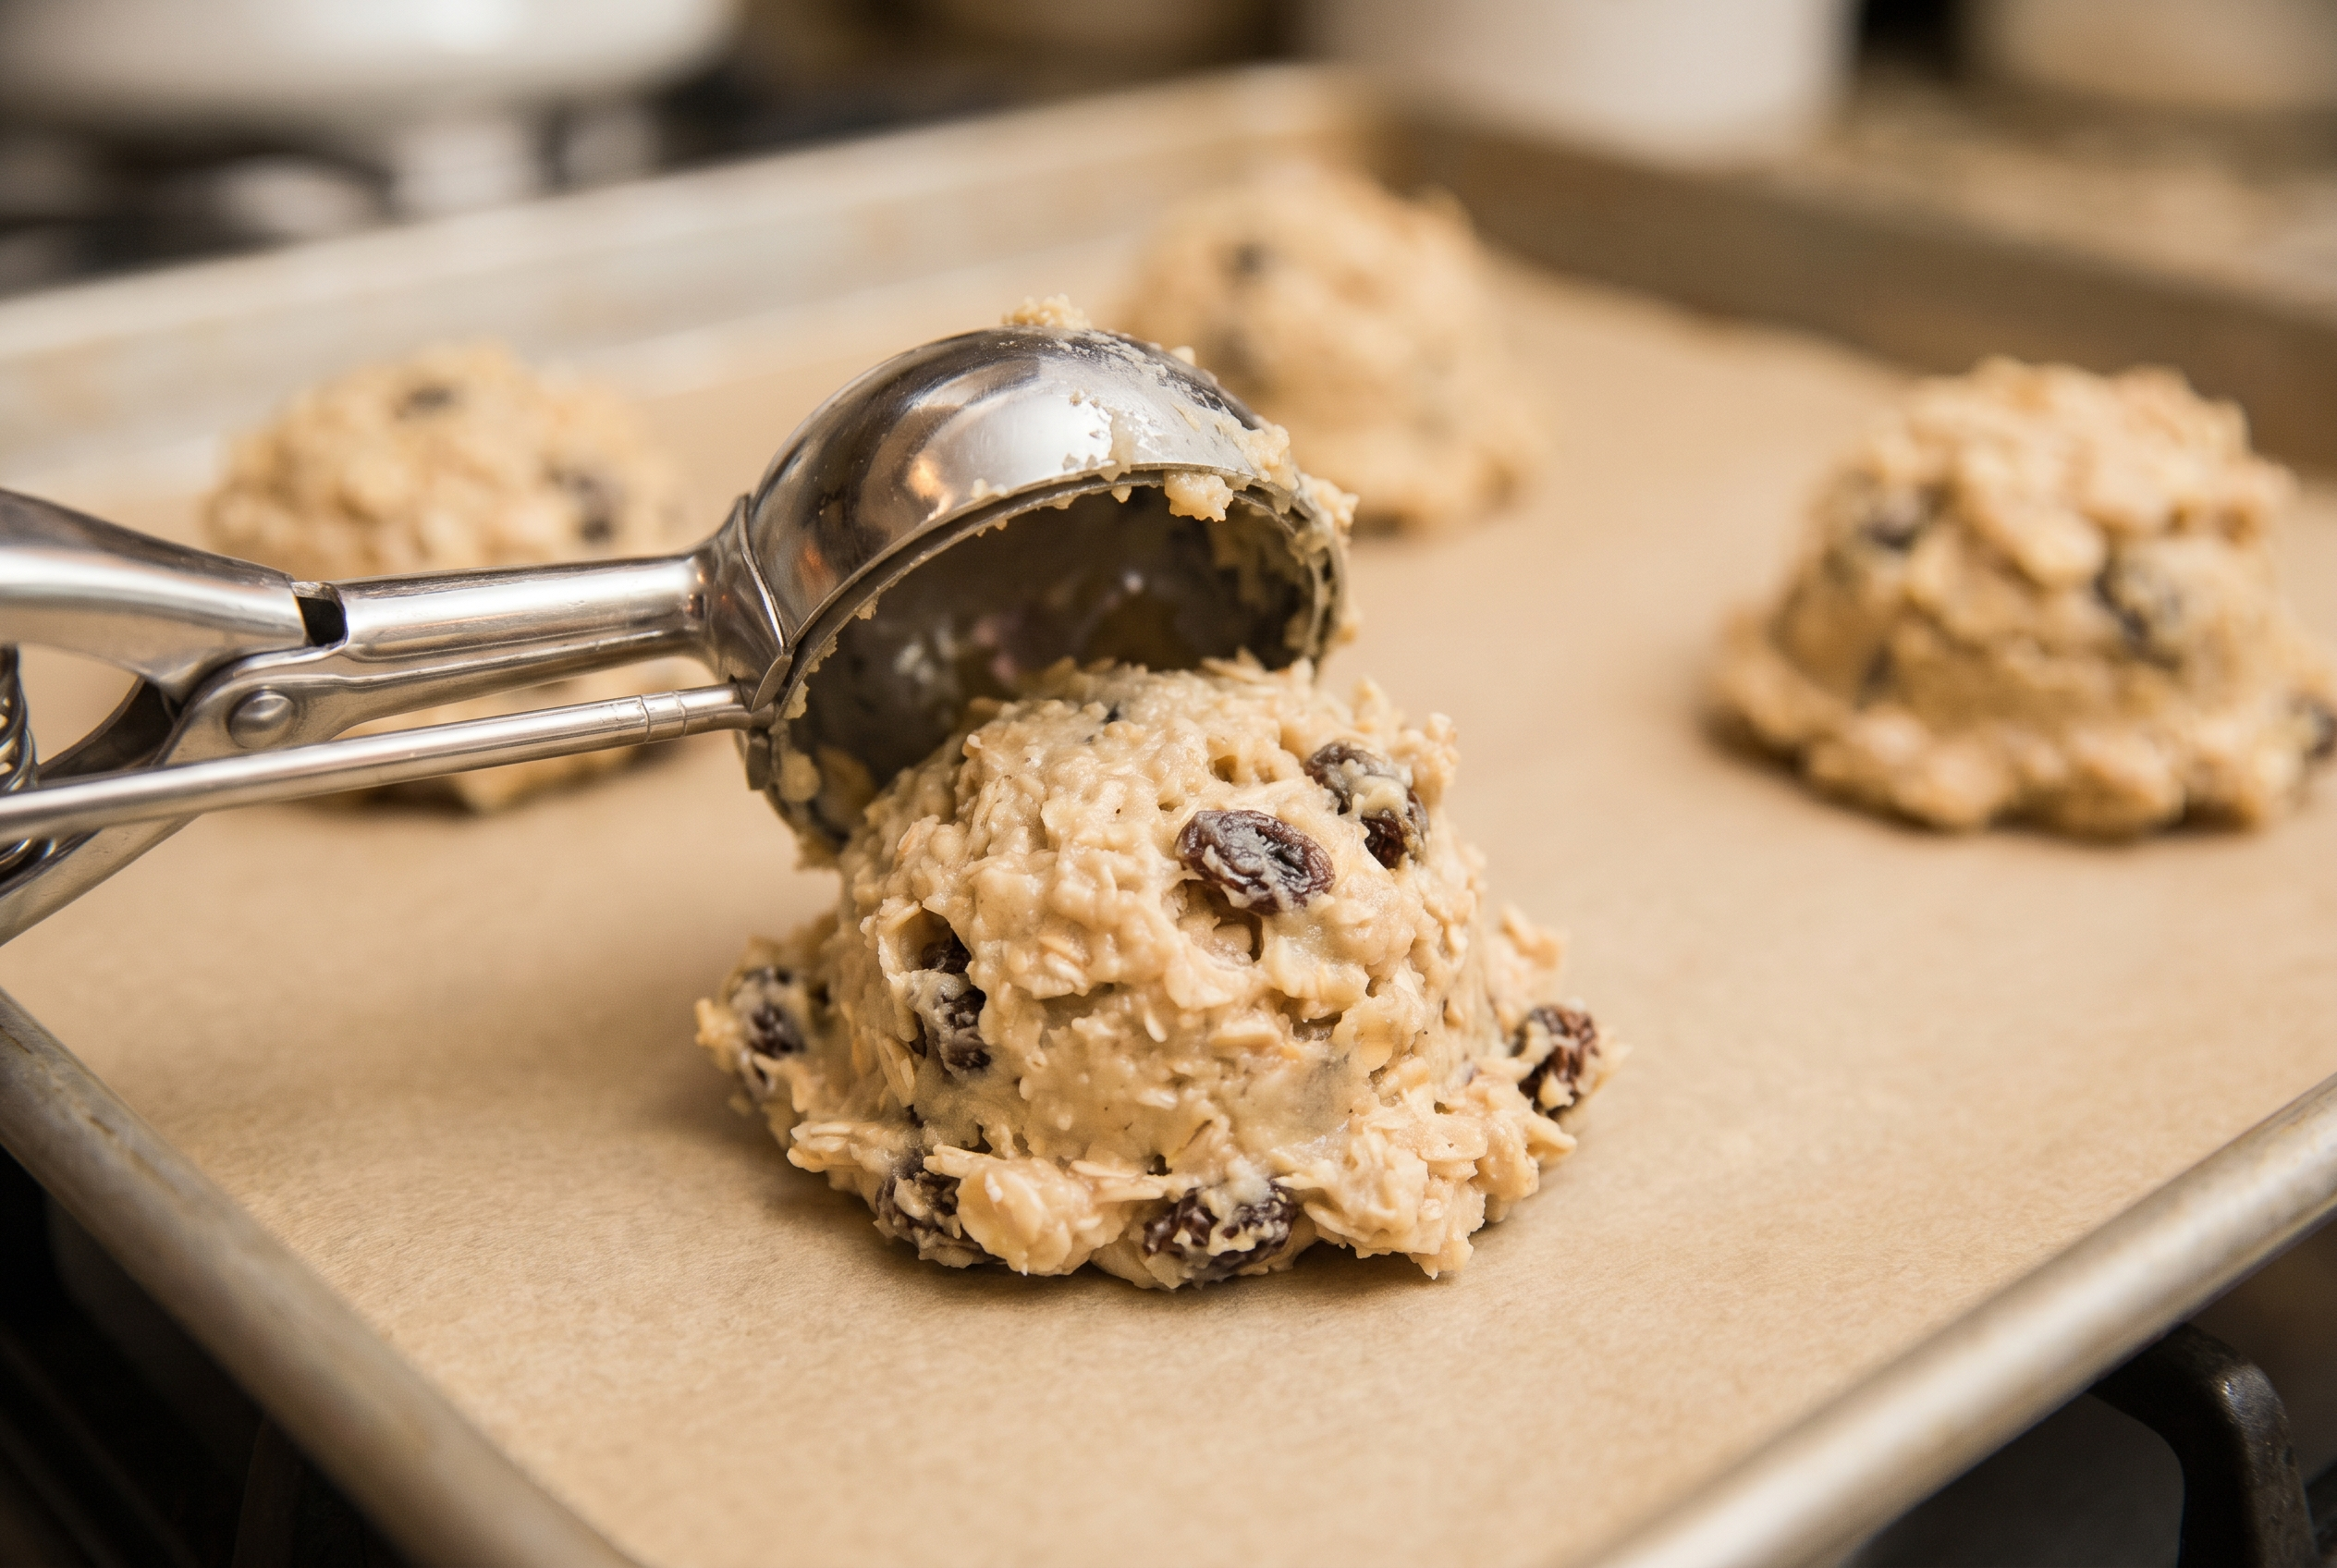
- Ice Cream Scoop – The absolute secret to portioning wet, sticky dough without losing your mind.
- Baking Sheet – A standard half-sheet pan to catch any runaway butter or dripping glaze.
Ingredients
For the Scones
- 1½ cups all-purpose flour Don’t pack it; spooning it into the measuring cup keeps your scones light and tender.
- 1¼ cups old-fashioned rolled oats Not quick-cook oats. As King Arthur Baking explains, quick oats absorb liquid far too fast and drastically change dough texture stick with old-fashioned.
- 1½ teaspoons baking powder Check the expiration date. Expired baking powder is the silent killer of flat, lifeless baked goods.
- ¼ teaspoon baking soda Contributes to that beautiful golden color on the edges.
- ¼ teaspoon salt Essential for balancing the maple sweetness so it doesn’t tip into cloying territory.
- ½ cup pecan halves Toasted and roughly chopped. Toasting deepens their flavor and preserves their crunch inside the baked scone. Toasting nuts before baking genuinely makes a difference.
- ½ cup currants Or raisins, or whatever dried fruit is surviving in the back of your pantry.
- ½ cup (1 stick) cold unsalted butter Cut into 10 pieces and kept cold until the exact moment you use it. Cold butter is what creates the flaky, layered texture of a proper scone.
- ⅓ cup cold heavy cream Not milk. Commit to the richness today.
- ½ cup pure maple syrup Use the real thing. According to Healthline, pure maple syrup contains antioxidants and minerals that pancake syrup completely lacks — and it tastes infinitely better in baking.
- 1 cold egg Binds everything together and adds structure.
For the Maple Glaze
- ½ cup confectioners’ sugar Sift it if you have the energy. Totally optional.
- 3 tablespoons pure maple syrup More real maple goodness drizzled right on top.
- 1 to 2 tablespoons water Just enough to make the glaze pourable, not runny.
Instructions
Set your expectations to “messy” and you will be absolutely thrilled with the results.
- Prep the pan: Preheat the oven to 350°F/175°C and set an oven rack in the middle position. Line a baking sheet with parchment paper. If you skip the parchment, you will be chiseling baked-on glaze off your pan until next Tuesday.
- Cut in the butter: Using a stand mixer fitted with the paddle attachment (or a handheld mixer), mix together the flour, oats, baking powder, baking soda, salt, pecans and currants on low speed for 10 to 15 seconds. Scatter the butter pieces over top and beat on low speed for about 30 seconds, or until the butter is somewhat broken down and grape-size pieces are still visible. Those visible butter chunks are exactly what create the flaky layers, so step away from the mixer before it turns into sand.
- Add the wet ingredients: In a small bowl, whisk together the cream, maple syrup and egg until thoroughly mixed. Pour the cream mixture into the butter mixture and mix on low speed for about 20 seconds, or just until the dough comes together. It will be fairly wet. Do not panic about the sticky texture; this is normal and means your scones won’t be dry.
- Scoop the dough: Remove the bowl from the mixer stand. Scrape the sides of the bowl with a rubber spatula to ensure that all of the dry ingredients are incorporated into the dough. Using an ice cream scooper, drop mounded scoops of the dough (about ⅓ cup each) onto the prepared baking sheet, forming 8 scones and spacing them about 2 in/5 cm apart. An ice cream scoop saves you from wrestling sticky dough with your bare hands.
- Bake and cool: Bake for 25 to 30 minutes, or until scones are golden brown around the edges and lightly golden on top. Transfer to a wire rack to cool for about 30 minutes. (Hold on to the parchment paper — you’ll need it for adding the glaze.) Patience is hard, but glazing a hot scone just results in a sad, sticky puddle on your counter.
- Glaze them: While the scones are cooling, make the glaze: In a small bowl, whisk together the confectioners’ sugar, maple syrup and enough of the water to make a smooth, pourable glaze. When the scones have cooled for at least 30 minutes, transfer them back to the parchment-lined baking sheet and use a spoon to drizzle the glaze evenly over top. If your drizzle looks more like a chaotic splatter, congratulations, you’ve nailed the rustic aesthetic.
♥ The Misfit Tips!
- Temperature matters above all else I once let my butter sit out during a long email reply. The scones spread flat like cookies. Keep your butter and cream refrigerator-cold until the exact second they’re needed.
- Oatmeal rules Use old-fashioned oats every single time. Quick oats absorb liquid too aggressively and produce a weirdly soft, dense dough that won’t give you the right texture.
- Make-ahead magic Scoop the unbaked dough mounds onto a sheet, freeze until solid, transfer to a freezer bag, and bake straight from frozen on a Sunday morning. You’ll feel like a domestic genius with absolutely zero extra effort.
Troubleshooting Guide
Something went sideways? Been there. Here is how to fix it.
- Problem: My scones spread out flat in the oven.
Why it happened: Your butter got too warm before baking.
Fix it: They will still taste amazing, just call them “scone-cookies.” Next time, chill the dough for 15 minutes before baking.
- Problem: The dough is way too sticky to handle.
Why it happened: This dough is naturally wet, which is why we scoop it instead of rolling and cutting it.
Fix it: Do not add more flour! Just use a scoop or two spoons to plop it onto the baking sheet.
- Problem: My glaze melted and disappeared.
Why it happened: You glazed them while they were still hot.
Fix it: It is fixable, I promise. Let them cool completely, make a little extra glaze, and double-dip them.
How to Store Maple Oatmeal Scones
❤
- Counter: Store in an airtight container at room temperature for up to 3 days keep them in a cool, dry spot since the glaze sweats in a warm kitchen.
- Fridge: Up to 3 days, though the crisp edges will soften significantly.
- Freezer (unbaked): The best freezing option. Scoop dough mounds, freeze on a sheet until solid, then transfer to a sealed bag for up to 3 months. Bake straight from frozen, adding 1–2 extra minutes.
- Freezer (baked): Also works cool completely, layer with parchment between scones in an airtight container, and freeze up to 3 months. Allow to come to room temperature before serving.
- Reheat: Toaster oven for a few minutes to restore the crisp edges. Avoid the microwave unless you enjoy the texture of warm rubber.
Glazed Oatmeal Maple Scones with Pecans & Currants
Ingredients
Method
- Prep the panPreheat oven to 350°F (175°C) and position an oven rack in the middle. Line a baking sheet with parchment paper. Skip the parchment and you'll be scraping caramelized maple glaze off your pan for the rest of the week.
- Cut in the butterUsing a stand mixer fitted with the paddle attachment (or a hand mixer), combine the flour, oats, baking powder, baking soda, salt, pecans, and currants on low speed for 10–15 seconds. Scatter the cold butter pieces over the top and beat on low for about 30 seconds, until the butter is partially broken down and grape-size chunks are still visible. Stop here. Those butter chunks are exactly what create the flaky layers in your maple oatmeal scones overmixing turns them into dense bricks.
- Add the wet ingredientsIn a small bowl, whisk together the cold cream, maple syrup, and egg until fully combined. Pour over the butter mixture and mix on low for about 20 seconds just until the dough comes together. It will be wet and sticky. This is correct.
- Scoop the doughRemove the bowl from the mixer. Scrape the sides with a rubber spatula to catch any dry pockets. Using an ice cream scoop, drop mounded ⅓-cup portions of dough onto the parchment-lined baking sheet about 8 scones total, spaced 2 inches apart. Do not attempt to shape them with your hands; the scoop IS the technique.
- Bake and coolBake for 25 to 30 minutes, until the edges are golden brown and the tops are lightly golden. Transfer to a wire rack and cool for at least 30 minutes. Keep the parchment paper you'll need it for glazing. Do not rush this step. Glazing hot scones creates a sad, sticky puddle.
- Glaze themWhisk together the confectioners' sugar, maple syrup, and just enough water to create a smooth, pourable consistency. Transfer the cooled scones back to the parchment-lined sheet and drizzle generously. If your drizzle looks like a chaotic Jackson Pollock congratulations, you've nailed the rustic aesthetic perfectly.